Introduction to Enabling TLS in R12.1
- The data between web browser and web server travels unencrypted in R12 application So the password and other information can be tracked by sniffer. We are avoiding this by implementing TLS in R12.
- With TLS implementation, the data travels in the encrypted forms and Only web browser and web server can decrypt it. The implementation requires the SSL certificate and configuration in the R12 environment as per the configuration
Transport Layer Security (TLS)
Transport Layer Security, or TLS, is the successor of SSL. TLS, like SSL, is a protocol that encrypts traffic between a client and a server. TLS creates an encrypted connection between two machines allowing for private information to be transmitted without the problems of eavesdropping, data tampering, or message forgery.
What is SSL?
SSL is a technology that defines the essential functions of mutual authentication, data encryption, and data integrity for secure transactions. Exchange of data between the client and server in such secure transactions is said to use the Secure Sockets Layer (SSL). This has been deprecated in favor of the preferred TLS reference going forward.
How SSL/TLS works
- The client sends a request to the server using HTTPS connection mode.
- The server presents its digital certificate to the client. This certificate contains the server’s identifying information like server name, Organization and server public key and digital signature of the CA private key
- The client (web browser) has the public keys of the all the CA. It decrypts the digital certificate private key This verification proves that the sender had access to the private key, and therefore is likely to be the person associated with the public key. If the verification goes good, the server is authenticated as a trusted server.
- The client sends the server a list of the encryption levels, or ciphers, that it can use.
- The server receives the list and selects the strongest level of encryption that they have in common.
- The client encrypts a random number with the server’s public key and sends the result to the server (which only the server should be able to decrypt with its private key); both parties then using the random number to generate a unique session key for subsequent encryption and decryption of data during the session
So it is clear from the steps above, we will need a digital certificate for the webserver .
Important Note
We have earlier also read the article
Enabling SSL or TLS in Oracle Apps R12
- The above article gives the implementation steps for SSL V3 /TLS1.0 with Oracle Apps R12.0 and R12.1 Version.
- This article specifically cover the steps for TLS 1.0/1.1/1.2 Implementation in R12.1
Enabling TLS in R12.1 will depend on the topology of the R12 implementation. I am here highlighting all the major one.
- A single webserver deployment.
This is pretty simple. We will need the digital certificate for the webserver. The steps are straight forward. The traffic between web browser and webserver will be encrypted
- Having a Load balancer which is serving to 2 or more webserver makes it little bit complicated
In this case, we could have following options
- End to end encryption of traffic
The entire traffic flow i.e. from browser to load balancer and from load balancer to web server is encrypted
There are two ways to do it
- Pass-through configuration: The load balance in this case does not decrypt/encrypt the message .it just passes through the traffic to the webserver
- Decryption/encryption: The load balance in this case decrypt the traffic at the load balancer level and then again encrypt it and send it to web server which again decrypt it
- SSL terminator: The traffic between web browser and load balancer is only encrypted. The Load balance acts as SSL terminator and terminate the SSL at the load balancer level and passes the unencrypted traffic to the webserver.
Steps to Enabling TLS in R12.1 on each topology is give below
A single webserver deployment
Step 0: Prerequisite
1) Upgrade to a minimum of Java Development Kit (JDK) 7.
To do this, follow the instructions in My Oracle Support Document 1467892.1, Using JDK 7.0 Latest Update with Oracle E-Business Suite Release 12.0 and 12.1.
2) – Upgrade to Oracle HTTP Server (OHS) 10.1.3.5.
To do this, follow the instructions in My Oracle Support Knowledge Document 454811.1, Upgrading to the Latest Oracle AS 10g 10.1.3.x Patch Set in Oracle E-Business Suite Release 12.
3) – Apply the October 2015 CPU or a later CPU to Oracle Fusion Middleware 10.1.3.5.
Download Patch 21845960 for UNIX or Patch 21845962 for Windows from My Oracle Support and follow the instructions in Document 2051000.1, Oracle E-Business Suite Releases 11i and 12 Critical Patch Update Knowledge Document (October 2015).
4) – Apply platform-specific updates.
For AIX and HP Itanium only, also apply Patch 21948197 to Oracle Fusion Middleware 10.1.3.5.
For Windows only, also apply Patch 22251660 to Oracle Fusion Middleware 10.1.3.5.
5) – Apply patch 22447165 and 22458773 to Oracle Fusion Middleware 10.1.3.5.
6) – Apply product-specific patches.
•Oracle Workflow – Apply patch 22974534:R12.OWF.B to address an Oracle Workflow Notification Mailer issue.
•Oracle iProcurement – Apply the patches mentioned in My Oracle Support Knowledge Document 1937220.1, Punch-out in Oracle iProcurement and Exchange Fails After Supplier Site Migrates From SSLv3 to TLS Protocol (with SSL Handshake SSLIOClosedOverrideGoodbyeKiss), which correspond to the appropriate applications version.
•Oracle iPayment – Ensure to meet the requirements listed in Document 1573912.1, All About Oracle Payments Release 12 Wallets and Payments Data Encryption, for Payments configuration. In addition, apply patch 22724663:R12.IBY.B.
•Oracle XML Gateway – For Oracle E-Business Suite Release 12.1 patching requirements, refer to Document 1961140.1, Configuring Oracle XML Gateway for SSL/TLS Authentication in Oracle E-Business Suite Release 12.1. In addition, apply patch 22922530:R12.ECX.B.
Step 1
Set Your Environment
- Logon to the application tier as the OS user who owns the application tier files.
- Source your application tier environment file (APPS<sid_machine>.env) located in the APPL_TOP directory.
- Navigate to the $INST_TOP/ora/10.1.3 and source the <sid_machine>.env file to set your 10.1.3 ORACLE_HOME variables.
- Go to directory $INST_TOP/certs/Apache
create a host-specific OpenSSL configuration file in that directory as the following
cat new.cnf
[req]
prompt = no
default_md = sha256
distinguished_name = dn
req_extensions = ext
[dn]
CN = www.example.com
O = Example Inc
OU = Key Team
L = San Diego
ST = California
C = US
[ext]
subjectAltName = DNS:www.example.com,DNS:example.com
Explanation
[req]
prompt = no                do not prompt
default_md = sha256      the default message digest should be sha256 based
distinguished_name = dn   get the Distinguished Name from the [dn] section
req_extensions = ext     get the extensions from the [ext] section
[dn]
CN = www.example.com        set Common Name to your full hostname
O = Example Inc             set the Organization to your company name
OU = Key Team               set Organizational Unit to any team or division within your company
L = San Diego               set Location to the city of your company's head quarters
ST = California             set State to the state or province or territory of your company's head quarters
C = US                       set Country to the ISO country code of the county
[ext]
subjectAltName = DNS:www.example.com,DNS:example.com        specify alternate hostnames.If the hostname of your site is WWW.<domain> also add the domain without the leading WWW. here.Otherwise just repeat the Common Name.
For our case ,the file would be
cat new.cnf
[req]
prompt = no
default_md = sha256
distinguished_name = dn
req_extensions = ext
[dn]
CN = www.techgoeasy.com
O = techgoeasy
OU = tech
L = Los Angles
ST = California
C = US
[ext]
subjectAltName = DNS: www.techgoeasy.com,DNS:techgoeasy.com
If you remember, this is similar to what we use to do in wallet with SSL
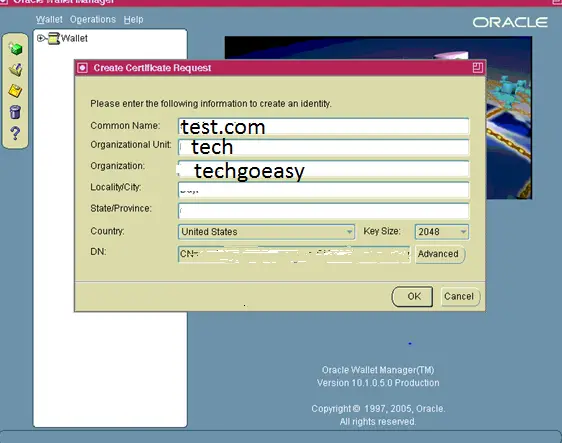
Step 2 Create the CSR file for certification generation
(a) Update PATH
PATH=$<10.1.3 OH>/Apache/open_ssl/bin:$PATH
(b) Make sure LD_LIBRARY_PATH contains a path to your Oracle Fusion Middleware 10.1.3 ORACLE_HOME/lib.
export LD_LIBRARY_PATH=$LD_LIBRARY_PATH:< FMW 10.1.3 ORACLE_HOME>/lib
(c) Now, run the following command:
openssl req -newkey rsa:2048 -nodes -keyout server.key -sha256 -out new.csr -config new.cnf
Submit the csr to the certificate authority to get the certificate
We are not using Oracle wallet here
Step 3 Receive server certificate and certificate chain files from the CA.
From the CA, you will receive the following:
1)A CA signed server certificate
2)The certificate of the root CA
3)The certificates of any required intermediate CAs
If you just receive one file,you can create these files by below method
Creating your Certifying Authority’s Certificate
To create ca.crt
- Copy server.crt to your PC (if necessary) using one of the following methods:
ftp (in binary mode) server.crt to your pc
copy the contents of server.crt and paste into notepad on the PC. Save the file as server.crt
- Double click on server.crt to open it with the Cyrpto Shell Extension.
- On the Certification Path tab click on the first (top) line and then View Certificate.
- On Details tab click Copy to File, this will start the export wizard.
- Click Next to continue.
- Select Base64 encoded X.509 (.CER) and click next.
- Click Browse and navigate to the directory of your choice.
- Enter ca.crt as the name and click ok to export the certificate.
- Close the wizard.
- Copy ca.crt back to your wallet directory (if necessary) using one of the following methods:
ftp (in binary mode) ca.crt to your application tier wallet directory. Copy the contents of ca.crt and paste into a new file in your application tier wallet directory using a text editor. Save the file as ca.crt
Place the above files in the same directory that contains your server private key: server.key.
You should ensure that the server certificate file is called server.crt, the root CA certificate is called ca.crt, and that the intermediate certificates are in a file called intermediate.crt.
If you do not have an intermediate certificate, run the following command to create an empty intermediate.crt file
echo -n > intermediate.crt
Verify that your $INST_TOP/certs/Apache directory contains the following files
server.key
new.csr
server.crt
intermediate.crt
ca.crt
Create a certificate file for OPMN containing the server certificate and any intermediate certificate by executing the following:
cat server.crt intermediate.crt ca.crt > opmn.crt
Step 4 Update the Context File
Use the E-Business Suite – Oracle Applications Manager (OAM) Context Editor to change the SSL related variables as shown in this table:
| SSL Related Variables in the Context File | ||
| Variable | Non-SSL Value | SSL Value |
| s_url_protocol | http | https |
| s_local_url_protocol | http | https |
| s_webentryurlprotocol | http | https |
| s_active_webport | same as s_webport | same as s_webssl_port |
| s_webssl_port | not applicable | default is 4443 |
| s_https_listen_parameter | not applicable | same as s_webssl_port |
| s_login_page | url constructed with http protocol and s_webport | url constructed with https protocol and s_webssl_port |
| s_external_url | url constructed with http protocol and s_webport | url constructed with https protocol and s_webssl_port |
Step 5 Perform additional configuration.
Copy the original files from <FND_TOP>/admin/template to <FND_TOP>/admin/template/custom, if the custom directory or any of the customized template files do not already exist. Update these custom files as documented below.
<FND_TOP>/admin/template/custom/opmn_xml_1013.tmp
Replace this line in the template:
<ssl enabled="true" wallet-file="%s_web_ssl_directory%/opmn"/>
With the following:
<ssl enabled="true" openssl-certfile="%s_web_ssl_directory%/Apache/opmn.crt" openssl-keyfile="%s_web_ssl_directory%/Apache/server.key" openssl-password="dummy" openssl-lib="%s_weboh_oh%/lib" ssl-versions="TLSv1.0,TLSv1.1,TLSv1.2" ssl-ciphers="AES128-SHA,DES-CBC3-SHA"/>
<FND_TOP>/admin/template/custom/httpd_conf_1013.tmp
The instructions here are to comment out one line and to add a new line to reference mod_ssl.so.
Modify the following
<IfDefine SSL>
LoadModule ossl_module libexec/mod_ossl.so
</IfDefine>
To the following:
<IfDefine SSL>
#LoadModule ossl_module libexec/mod_ossl.so
LoadModule ssl_module libexec/mod_ssl.so
</IfDefine>
<FND_TOP>/admin/template/custom/ssl_conf_1013.tmp (for UNIX)
Step 1 - Comment out the following line in the template:
 #SSLWallet file:%s_web_ssl_directory%/Apache
Step 2 - Add the following 3 lines into the template:
SSLCertificateFile %s_web_ssl_directory%/Apache/server.crt
SSLCertificateKeyFile %s_web_ssl_directory%/Apache/server.key
SSLCertificateChainFile %s_web_ssl_directory%/Apache/intermediate.crt
Step 3 - Replace the following:
SSLCipherSuite HIGH:MEDIUM:!aNULL:+SHA1:+MD5:+HIGH:+MEDIUM
With the following:
SSLCipherSuite HIGH:MEDIUM:!aNULL:!RC4:!SEED:!IDEA:!CAMELLIA:+HIGH:+MEDIUM
tep 4 - Replace the following:
SSLProtocol    -all +TLSv1 +SSLv3
With the following: SSLProtocol all -SSLv2 -SSLv3
Step 6 Perform additional configuration to enable TLS1.1 And TLS 1.2
The following modification will enable the TLS 1.1 and TLS 1.2 protocols which are not enabled by default in Java 7.
Copy the original files mentioned in the table below from <FND_TOP>/admin/template to <FND_TOP>/admin/template/custom, if the custom directory or any of the customized template files do not already exist. Update these custom files as documented below.
| Custom Template File | Modification |
| <FND_TOP>/admin/template/custom/oc4j_properties_1013.tmp <FND_TOP>/admin/template/custom/oafm_oc4j_properties_1013.tmp <FND_TOP>/admin/template/custom/forms_oc4j_properties_1013.tmp ( | Add:
https.protocols=TLSv1,TLSv1.1,TLSv1.2 |
Step 7 Update the b64InternetCertificate.txt TrustStores.
Add the contents of the ca.crt file to b64InternetCertificate.txt file located in the 10.1.2 ORACLE_HOME/sysman/config directory:
| $ cat ca.crt >> <10.1.2 ORACLE_HOME>/sysman/config/b64InternetCertificate.txt |
Step 8 – Update the cacerts TrustStore.
If you purchased your server certificate from a commercial CA, you will most likely not have to perform this step as the root CA certificate will already be present in cacerts. The keytool command will let you know if you attempt to add a certificate already present in cacerts.
Follow these steps to be sure these requirements are met:
- Navigate to the $OA_JRE_TOP/lib/security directory.
- Backup the existing cacerts file.
- Copy your ca.crt files to this directory and issue the following command to insure that cacerts has write permissions
$ chmod u+w cacerts
Add your Apache ca.crt to cacerts:
$ keytool -importcert -alias ApacheRootCA -file ca.crt -v -keystore cacerts
When prompted, enter the keystore password (default password is “changeit”).
Add your Apache ca.crt to cacerts:
$ keytool -importcert -alias ApacheRootCA -file ca.crt -v -keystore cacerts
When prompted, enter the keystore password (default password is “changeit”).
Add your Apache ca.crt to cacerts:
$ keytool -importcert -alias ApacheRootCA -file ca.crt -v -keystore cacerts
When prompted, enter the keystore password (default password is “changeit”).
$ chmod u-w cacerts
Step 9 – Run Autoconfig
Autoconfig can be run by using the adautocfg.sh script in the Application Tier $ADMIN_SCRIPTS_HOME directory.
Step 10 – Restart the Application Tier services
Use the adapcctl.sh script in the $ADMIN_SCRIPTS_HOME directory to stop and restart the Application Tier Apache services.
Steps to be used when going for SSL terminator
There is no need for certificate creation and installation on the web server. In this case, we just need to set the context file parameter given below
| Changes when using an SSL Accelerator | ||
| Variable | Non-SSL Value | SSL Value |
| s_url_protocol | http | http |
| s_local_url_protocol | http | http |
| s_webentryurlprotocol | http | https |
| s_active_webport | same as s_webport | value of the SSL Accelerator’s external interfacing port |
| s_webentryhost | same as s_webhost | SSL Accelerator hostname |
| s_webentrydomain | same as s_domainname | SSL Accelerator domain name |
| s_enable_sslterminator | # | remove the ‘#’ to use ssl_terminator.conf in ssl terminated environments |
| s_login_page | url constructed with http protocol and s_webport | url constructed with https protocol, s_webentryhost, s_webentrydomain, s_active_webport |
| s_external_url | url constructed with http protocol and s_webport | url constructed with https protocol, s_webentryhost, s_webentrydomain, s_active_webport |
Run Autoconfig
Autoconfig can be run by using the adautocfg.sh script in the Application Tier $ADMIN_SCRIPTS_HOME directory.
Restart the Application Tier services
Use the adapcctl.sh script in the $ADMIN_SCRIPTS_HOME directory to stop and restart the Application Tier Apache services.
Steps for End to end encryption with Pass through configuration on Load Balancer
1) All the steps given for single web server need to be executed.
2) The certificate need to be created with load balancer Name
3) We can execute the certificate steps on one Node and then copy all the steps to the other nodes
Context value changes
| SSL Related Variables in the Context File | ||
| Variable | Non-SSL Value | SSL Value |
| s_url_protocol | http | https |
| s_local_url_protocol | http | https |
| s_webentryurlprotocol | http | https |
| s_active_webport | same as s_webport | same as s_webssl_port |
| s_webssl_port | not applicable | default is 4443 |
| s_https_listen_parameter | not applicable | same as s_webssl_port |
| s_login_page | url constructed with http protocol and s_webport | url constructed with https protocol and s_webssl_port |
| s_external_url | url constructed with http protocol and s_webport | url constructed with https protocol and s_webssl_port |
Run Autoconfig
Autoconfig can be run by using the adautocfg.sh script in the Application Tier $ADMIN_SCRIPTS_HOME directory.
Restart the Application Tier services
Use the adapcctl.sh script in the $ADMIN_SCRIPTS_HOME directory to stop and restart the Application Tier Apache services.
Steps for End to end encryption with Encryption/decryption on Load Balancer
1) All the steps given for single web server need to be executed.
2) The certificate need to be created at load balancer level and web node level also. It need to be created with load balancer Name on both the side
3) We can execute the certificate steps on one Web Node and then copy all the steps to the other nodes
4) The Load balance should have the client SSL certificate for the Web node certificate
Context value changes
| SSL Related Variables in the Context File | ||
| Variable | Non-SSL Value | SSL Value |
| s_url_protocol | http | https |
| s_local_url_protocol | http | https |
| s_webentryurlprotocol | http | https |
| s_active_webport | same as s_webport | same as s_webssl_port |
| s_webssl_port | not applicable | default is 4443 |
| s_https_listen_parameter | not applicable | same as s_webssl_port |
| s_login_page | url constructed with http protocol and s_webport | url constructed with https protocol and s_webssl_port |
| s_external_url | url constructed with http protocol and s_webport | url constructed with https protocol and s_webssl_port |
Run Autoconfig
Autoconfig can be run by using the adautocfg.sh script in the Application Tier $ADMIN_SCRIPTS_HOME directory.
Restart the Application Tier services
Use the adapcctl.sh script in the $ADMIN_SCRIPTS_HOME directory to stop and restart the Application Tier Apache services.
Additional Configuration
Database tier setup
Oracle products such as Oracle Configurator, Order Management, Order Capture, Quoting, iPayment, iStore, and Pricing are leveraging the database as an HTTP client. The implementation of TLS for the Oracle Database Server (which acts as a client sending requests to the Web server) makes use of the Oracle Wallet Manager for setting up an Oracle wallet.
To enable the HTTPS client request from the database using UTL_HTTP, you need to establish a truststore in wallet format. You do not need a server certificate for this wallet. You only need to import the root CA certificate for the root CAs that are the trust anchor for the sites you need UTL_HTTP to connect to.
- After setting your environment for the database tier, navigate to the $ORACLE_HOME/appsutil directory.
- Create a new wallet directory named wallet.
- Navigate to the newly created wallet directory.
- Open the Oracle Wallet Manager as a background process.
owm &
- In the Oracle Wallet Manager Menu, navigate to Wallet > New.
Answer NO to: Your default wallet directory doesn’t exist. Do you wish to create it now? The new wallet screen will now prompt you to enter a password for your wallet. Click NO when prompted: A new empty wallet has been created. Do you wish to create a certificate request at this time? - If you need to import ca.crt, on the Oracle Wallet Manager menu navigate to Operations > Import Trusted Certificate. Click OK. Double click on ca.crt to import it.
- Save the wallet: On the Oracle Wallet Manager Menu, click Wallet. Verify the Auto Login check box is selected. Click Save.
To test that the wallet is properly set up and accessible, log in to SQLPLUS as the apps user and execute the following:
SQL>select utl_http.request(‘[address to access]’, ‘[proxy address]’, ‘file:[full path to wallet directory]’, null) from dual;
where:
‘[address to access]’ = the URL for your Oracle E-Business Suite Rapid Install Portal.
‘[proxy address]‘ = the URL of your proxy server, or NULL if not using a proxy server.
‘file:[full path to wallet directory]’ = the location of your wallet directory (do not specify the actual wallet files).
The final parameter is the wallet password, which is set to null by default.
Examples:
SQL>select utl_http.request('https://www.oracle.com/robots.txt','http://www-proxy.com:80', 'file:/d1/oracle/db/tech_st/12.1.0/appsutil/wallet', null) from dual;
SQL>select utl_http.request('https://www.oracle.com/robots.txt',null, 'file:/d1/oracle/db/tech_st/12.1.0/appsutil/wallet', null) from dual;
If the wallet has been properly set up, you will be returned the first 2,000 characters of the HTML page.
Related links
Enabling SSL or TLS in Oracle E-Business Suite Release 12 (Doc ID 2143099.1)
How to find R12 components Version
40 Adpatch question every DBA should know
awk command
Keytool command