Putty is a wonderful client to connect to Linux or Unix servers easily. It has the option to connect using both telnet or ssh protocol. It has the option of RAW, serial, RLogin also
It is available for Windows 95, 98, XP, Vista, and 7,10 and It can downloaded from the below link
Download Putty here
How to Setup Putty Client on Windows
There are two ways to do it
Standalone Binaries
(1) Download consist of putty.exe executable.
(2) Save the download to any convenient folder.
Let’s for example, the folder is
C:/tech
(3) If you want to create a shortcut to PuTTY on your desktop:
a.Open the C:/tech folder in Windows Explorer.
b Right click on the putty.exe file and select Send To > Desktop
Package Install
Download the “*.msi” file and double-click to install it as a program on Windows
How to launch the client
Double-click on the putty.exe program or the desktop shortcut to launch the application.
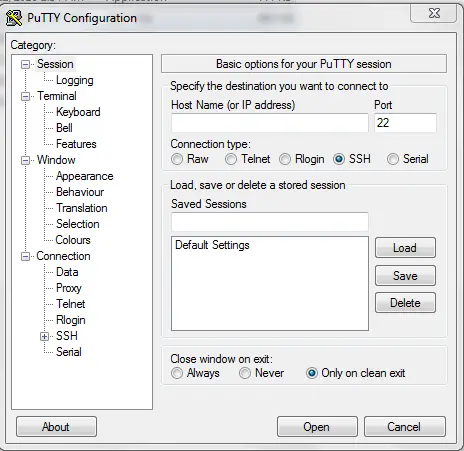
The following screen will be displayed
Now we are ready to connect to any Linux or Unix server
How to use Putty for SSH or Telnet
You should have beforehand before you proceed with the below steps
(a)Hostname or IP address of the VPS or dedicated server
(b) Protocol to use SSH or telnet
(c) For SSH, it will ask for verification of keys
(d) Username and password and login to the system
Step 1
Put the server name in the hostname field and choose the appropriate protocol
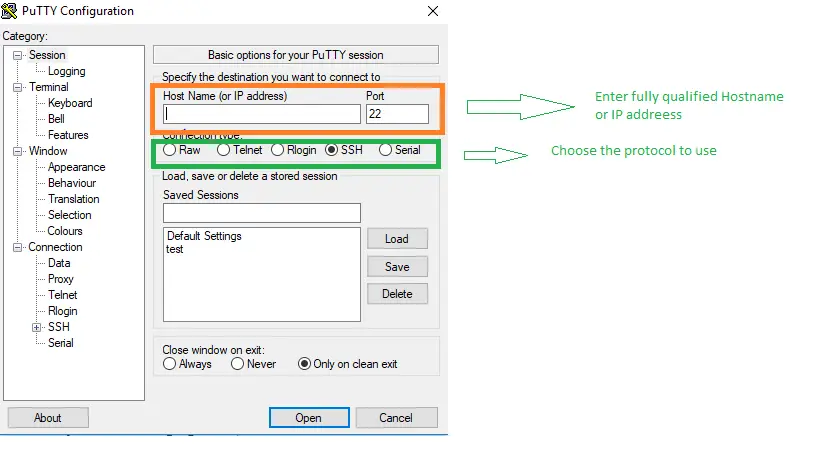
and click open
Step 2
If you have chosen SSH protocol which is the default and secure one,then the below message will be displayed
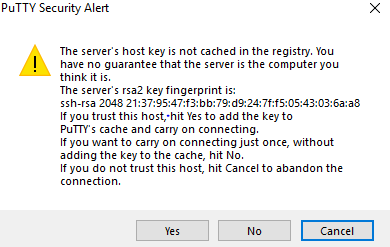
Click Yes
In the case of telnet,it will directly go to the next step
Step 3
Now you will be shown below on the screen
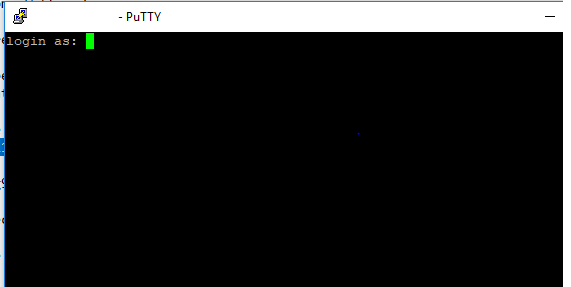
Enter the Username and then it will ask for a password. Enter the password and you will get the $ sign and now you can proceed with your activities
Other features of Putty Client which can be used
(1) You can log the activities being done on the Putty client using the logging option
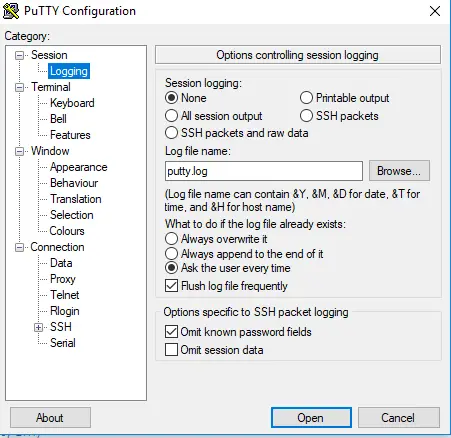
You can put the location of the log file at your convenience
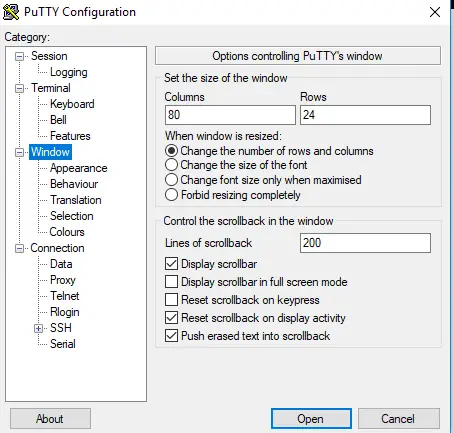
(2)You can specify the Number of rows, columns and scroll back length in the window option on the left-hand side
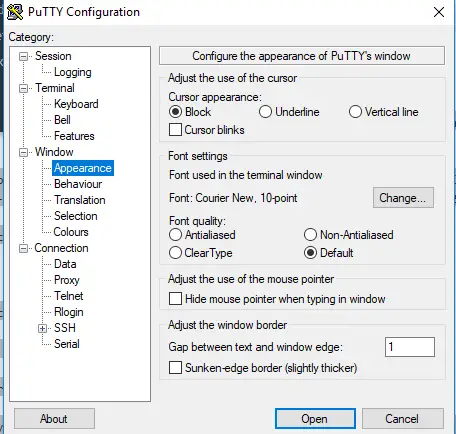
(3) You can specify the cursor type and font settings in appearance on the left side
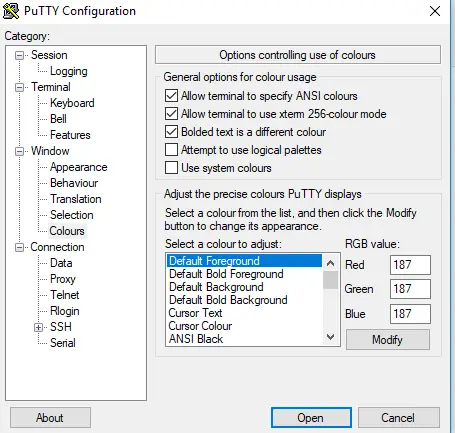
(4) You can change the terminal colour settings using colour setting on left hand side
We can use the PuttyCM tool. It is very useful if you are managing multiple servers
PuTTY CONNECTION MANAGER (PuttyCM)
Hope you like this post. Please do provide feedback
Related Articles
SSH Putty Commands:- 41 Useful SSH commands to help you manage the VPS /Dedicated Server
SSH passwordless:- How to enable SSH passwordless login setup between two servers
Remote Desktop Manager: – Awesome Free Remote Desktop manager
install SSH on Ubuntu: How to install SSH on Ubuntu with Detailed steps and Problem faced
export Putty Sessions: Check out how to export Putty Sessions and then import them, Step by step detail is provided to move your putty session to another system