I will be posting the step by step Oracle 19c Database Installation on Linux. First we will performing the binaries installation and then creating the database using DBCA
Package and OS requirements
We can install the Oracle Provided 19c preinstall package to meet the Package and OS requirement
Running the below yum command (as root):
yum install -y oracle-database-preinstall-19c
yum update -y
Download the database 19c software
You need to download Oracle Database 19c from the Oracle Technology Network (OTN)
Once you’ve downloaded the software, unzip file to the oracle home directory. With Oracle 19c , you dont need any staging directory. You can just unzip to Oracle Home
Here we have download Oracle 19.3 fom the Oracle 19c linux download page
mkdir -p /f01/app/oracle/product/19.3
unzip LINUX.X64_193000_db_home.zip -d /f01/app/oracle/product/19.3
All of the contents from the above will be extracted to the oracle home directory.
Start the installation
Open an X-Windows session to the server as the ‘oracle’ user.
/f01/app/oracle/product/19.3/runInstaller
Once the GUI starts, respond as follows:
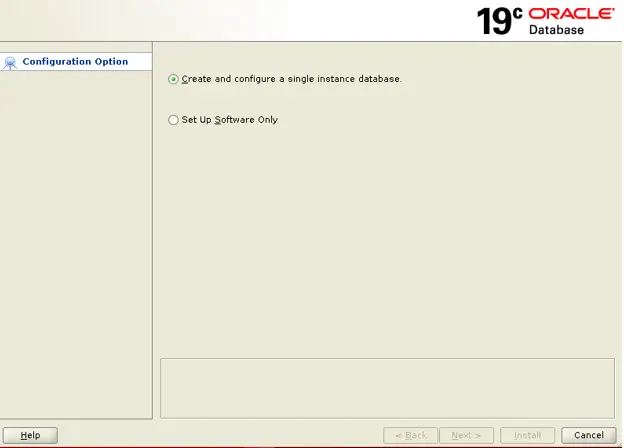
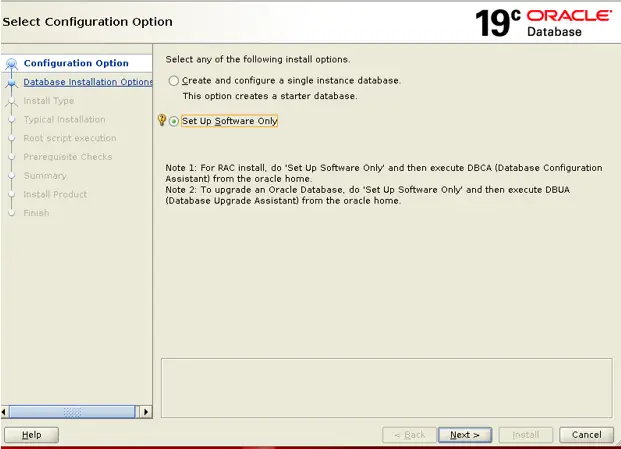
Click on Setup Software Only and then do Next
Click on Single Instance database installation and click Next

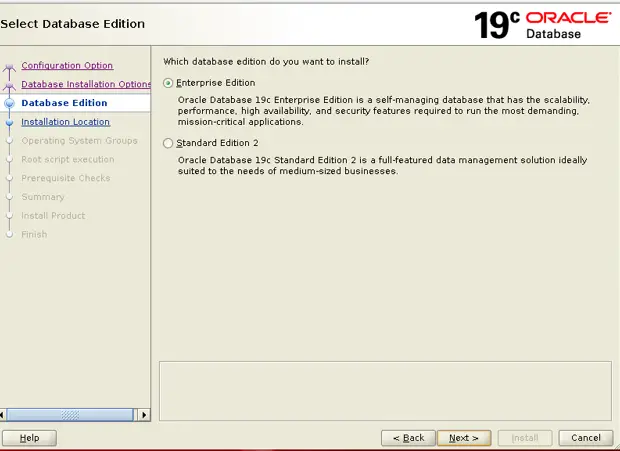
Click on Type of edition you require and then click next( Here we are choosing Enterprise Edition)
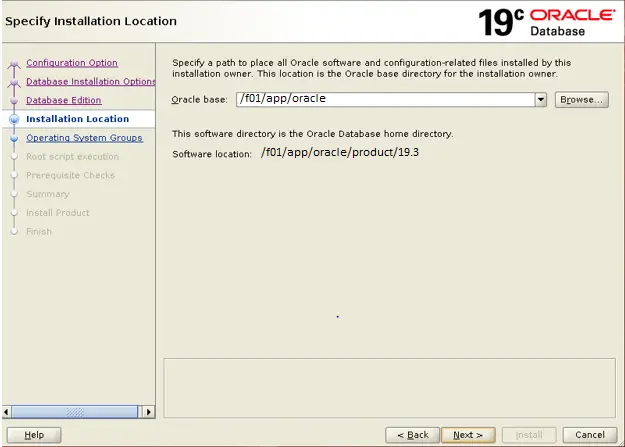
Write the Oracle Base and then click next
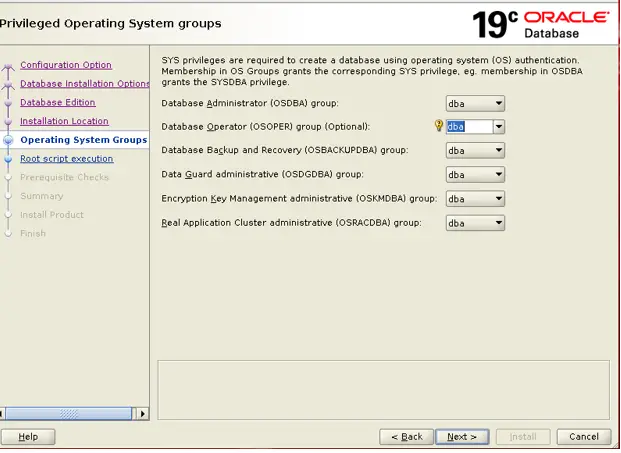
Choose the default and click next
With 19c, you can choose the run the root.sh from installation only by providing the root passwotd or sudo information. Here we choose to take the manual root and just click Next

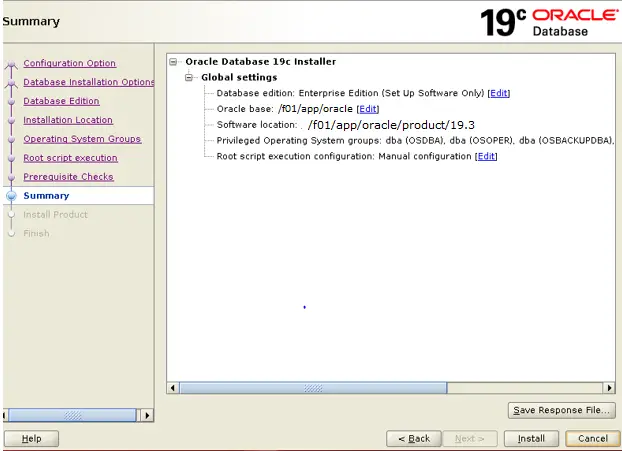
Review the information and click on install
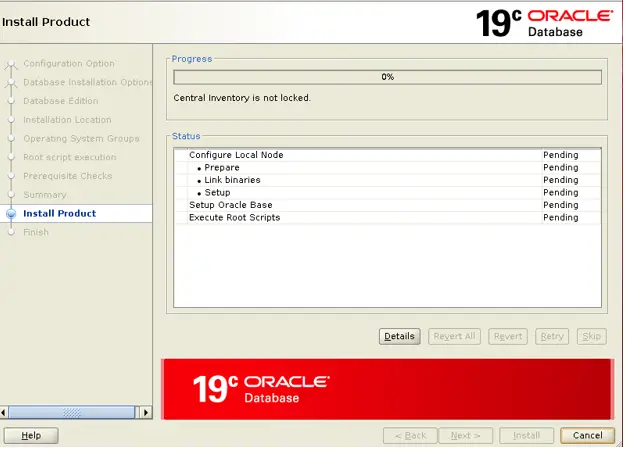
When Prompted run below scripts
When prompted, run the following as root:
/f01/app/oracle/product/19.3/root.sh
/f01/app/oracle/product/19.3/root.sh
Performing root user operation
The following environment variables are set as:
ORACLE_OWNER= oracle
ORACLE_HOME= /f01/app/oracle/product/19.3
Enter the full pathname of the local bin directory: [/usr/local/bin]:
Copying dbhome to /usr/local/bin …
Copying oraenv to /usr/local/bin …
Copying coraenv to /usr/local/bin …
Creating /etc/oratab file…
Entries will be added to the /etc/oratab file as needed by
Database Configuration Assistant when a database is created
Finished running generic part of root script.
Now product-specific root actions will be performed.
Oracle Trace file Anaylzer(TFA - Standalone mode) is available at
/f01/app/oracle/product/19.3/bin/tfactl
Now Oracle Software installation is completed.Click on Close it
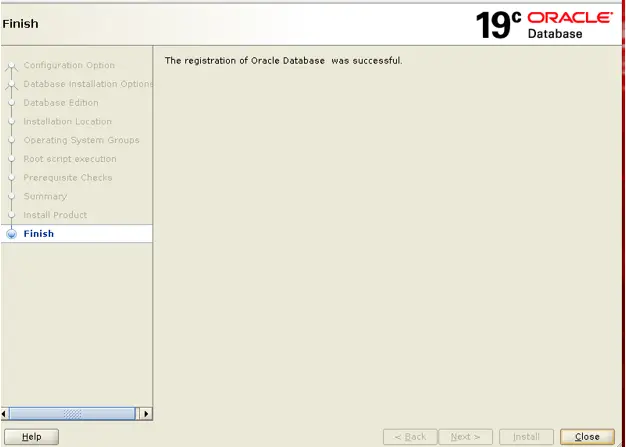
This conclude the Oracle Binaries installation.
Now lets do the create database
Create Database
Go to the directory /f01/app/oracle/product/19.3/bin and then
./dbca
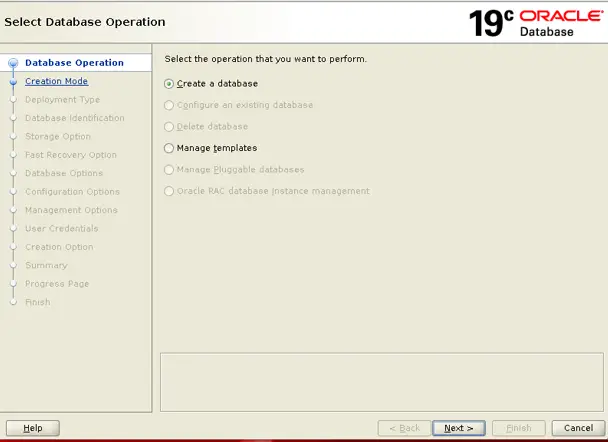
Click on Create database and click NEXT
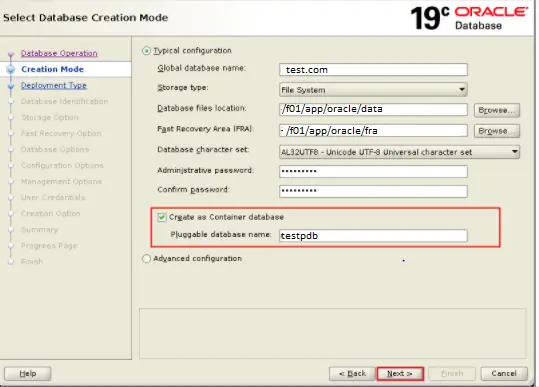
Now database configuration window will appear
We are choosing the Typical Configuration and creating the container database Here
We have to provide the Global database Name, File location ,sys password, pluggable database name
The Summary window appears. Review the information. Click Finish.
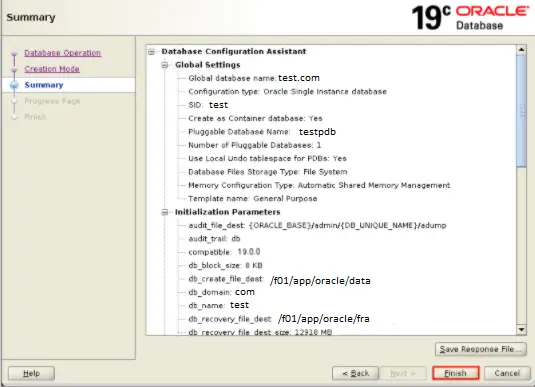
After this database should create successfully
Post Installation Configuration Steps.
(1) Set the environment variable for Oracle database
export ORACLE_BASE=/f01/app/oracle
export ORACLE_HOME=/f01/app/oracle/product/19.3
export ORACLE_SID=TEST
export PATH=/usr/sbin:$PATH
export PATH=$ORACLE_HOME/bin:$PATH
export LD_LIBRARY_PATH=$ORACLE_HOME/lib:/lib:/usr/lib
export CLASSPATH=$ORACLE_HOME/jlib:$ORACLE_HOME/rdbms/jlib
(2) Do the listener Configuration
TEST =
(DESCRIPTION_LIST =
(DESCRIPTION =
(ADDRESS = (PROTOCOL = TCP)(HOST = TECH.com)(PORT = 1521))
)
)
SID_LIST_TEST =
(SID_LIST =
(SID_DESC =
(ORACLE_HOME= /f01/app/oracle/product/19.3)
(SID_NAME = TEST)
)
)
STARTUP_WAIT_TIME_TEST = 0
CONNECT_TIMEOUT_TEST = 10
TRACE_LEVEL_TEST = OFF
LOG_DIRECTORY_TEST = /f01/app/oracle/product/19.3/network/admin
LOG_FILE_TEST = TEST
TRACE_DIRECTORY_TEST = /f01/app/oracle/product/19.3/network/admin
TRACE_FILE_TEST = TEST
ADMIN_RESTRICTIONS_TEST = ON
SUBSCRIBE_FOR_NODE_DOWN_EVENT_TEST = OFF
(3) Perform the TNS configuration $ORACLE_HOME/network/admin/tnsnames.ora to connect to the PDB and container database
TESTPDB=
(DESCRIPTION=
(ADDRESS=(PROTOCOL=tcp)(HOST=TECH.com)(PORT=1521))
(CONNECT_DATA=
(SERVICE_NAME=TESTPDB)
(INSTANCE_NAME=TEST)
)
)

TEST =
(DESCRIPTION =
(ADDRESS = (PROTOCOL=tcp)(HOST=tech.com)(PORT=1521))
(CONNECT_DATA = (SERVICE_NAME=TEST)(INSTANCE_NAME=TEST))
)
(4) How to login to the Container Database
sqlplus / as sysdba SQL*Plus: Release 19.0.0.0.0 - Production on Fri Jun 23 07:08:04 2020 Version 19.6.0.0.0 Copyright (c) 1982, 2019, Oracle. All rights reserved. Connected to: Oracle Database 19c Enterprise Edition Release 19.0.0.0.0 - Production Version 19.6.0.0.0 SQL> show pdbsCON_ID CON_NAME OPEN MODE RESTRICTED----- ------ -------- ----------2 PDB$SEED READ ONLY NO3 TESTPDB READ WRITE NO
or
sqlplus sys/<pass>@TEST SQL*Plus: Release 19.0.0.0.0 - Production on Fri Jun 23 07:08:04 2020 Version 19.6.0.0.0 Copyright (c) 1982, 2019, Oracle. All rights reserved. Connected to: Oracle Database 19c Enterprise Edition Release 19.0.0.0.0 - Production Version 19.6.0.0.0 SQL> show pdbsCON_ID CON_NAME OPEN MODE RESTRICTED---- ------ ---------- ---------2 PDB$SEED READ ONLY NO3 TESTPDB READ WRITE NO
(5) How to connect to the Pluggable Database
sqlplus <user>/<pass>@TESTPDB
SQL*Plus: Release 19.0.0.0.0 - Production on Fri Jun 23 07:08:04 2020
Version 19.6.0.0.0
Copyright (c) 1982, 2019, Oracle. All rights reserved.
Connected to:
Oracle Database 19c Enterprise Edition Release 19.0.0.0.0 - Production
Version 19.6.0.0.0
SQL> select * from dual
How to do silent installation of Oracle Home
./runInstaller -ignorePrereq -waitforcompletion -silent \
    -responseFile ${ORACLE_HOME}/install/response/db_install.rsp \
    oracle.install.option=INSTALL_DB_SWONLY \
    ORACLE_HOSTNAME=${ORACLE_HOSTNAME} \
    UNIX_GROUP_NAME=oinstall \
    INVENTORY_LOCATION=${ORA_INVENTORY} \
    SELECTED_LANGUAGES=en,en_GB \
    ORACLE_HOME=${ORACLE_HOME} \
    ORACLE_BASE=${ORACLE_BASE} \
    oracle.install.db.InstallEdition=EE \
    oracle.install.db.OSDBA_GROUP=dba \
    oracle.install.db.OSBACKUPDBA_GROUP=dba \
    oracle.install.db.OSDGDBA_GROUP=dba \
    oracle.install.db.OSKMDBA_GROUP=dba \
    oracle.install.db.OSRACDBA_GROUP=dba \
    SECURITY_UPDATES_VIA_MYORACLESUPPORT=false \
    DECLINE_SECURITY_UPDATES=true
I hope you like this post on Step by Step Oracle 19c Database Installation on Linux with container database creation. Please do provide the feedback
Related Articles
Oracle 19c upgrade step by step
How to upgrade EBS database to 19c: Step by Step